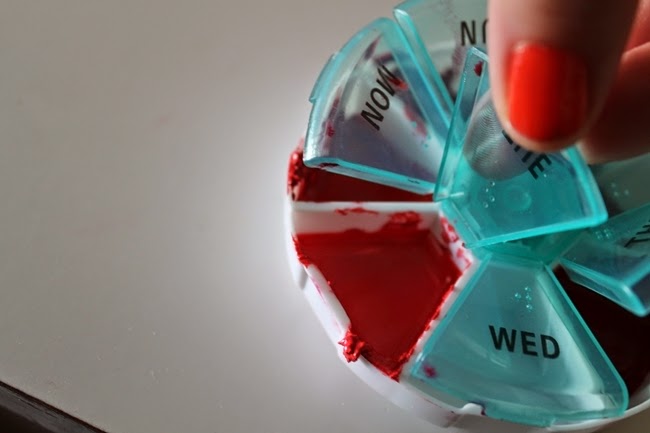
Today I want to show you all how I salvaged my damaged lipsticks.
My kids are tiny lipstick destroying ninjas. They sneak to my vanity, open the drawers and can demolish 6 lipsticks in .5 seconds. They know the trick for child safety locks, latched train cases and even if I keep them on a high shelf, they somehow manage to get their hands on them. Luckily, I tend to buy cheap lipsticks as it is but I hate to throw away a week old tube just after its been smashed, with all of that perfectly usable product still inside the lid and tube
I picked up a 7 day pill organizer from the dollar store on Friday and rescued the remnants of my favorite lipsticks. Here's how
Scoop the chunks of lipstick from the lids and tubes...or lumps left on the vanity table after an ordeal and scrape them into the separate compartments, making note of which lipstick went into which compartment. I started with Thursday and lined them up in order as I went through them all
Microwave the container with the lids open 30 seconds at a time until everything is melted. I nuked mine for 1 minute.
clean up the edges with a q-tip and label the compartments. I used washi tape from my stash but you could use printable labels, stickers or contact paper.
- If you have any leftover bits still left in the tube, you can microwave the tube (as long as there's no metal in it of course) and pour it into the compartment.
- If you have very little product left, mix colors for a new shade
- Use a small brush to apply color from your new lipstick compact collection
See my other tutorial for How to Refill a Vintage Lipstick Tube
one more very important tip- If you have a lipstick covered child, Walmart and Target carry a great oil free makeup remover for a buck or two- good to keep on hand. In a pinch, vegetable or olive oil followed by a warm bubble bath will take it right off.


Brilliant! Although I don't have kids destroying my lipsticks, other life incidents (like leaving a tube in a hot car, pressing too hard with the lipstick twisted up to high and it breaking, etc.) still mess with my lipstick collection. This is great for those lipstick 911 calls!
ReplyDeleteYou made me laugh :)
ReplyDeleteThis is very useful to know, Thankyou!
This may be one of those universal childhood experiences. I remember getting hold of lipstick and using it to "write" all over the powder room walls, the mirror, and the toilet tank. Mother was NOT pleased. This is a good trick, and you've probably helped someone salvage expensive lippy.
ReplyDeleteHow smart..
ReplyDeleteHaha! Clever and fun!
ReplyDeleteI also scrabe lipstick residues and melt it into small boxes, but I have just found a new and easy method: I carefully warm it in a spoon over and candle. Thanks for the tip, you have a really lovely palette now. :)
ReplyDeleteWhat a brilliant idea! :)
ReplyDeleteGreat idea! I've used your tutorial for refilling a vintage lipstick tube and it worked pretty well. Next time I'll leave the lipstick in the freezer a little longer. Do you have and tricks for refilling a vintage compact with pressed powder? I seem to remember reading a blog post about that somewhere but can't remember if it was your post or another blogger's.
ReplyDelete-Emily
Emily's Vintage Visions
Great tutorial. Out of curiosity where is the pretty umbrella print fabric from?
ReplyDelete